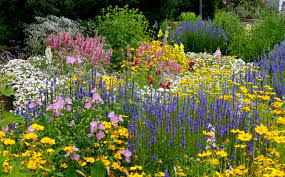
Plant Selections for Your Yard

Living in the mountains is beautiful and gardening is even more so (to the gardener). Like any location there will be things to learn to succeed and errors made in the learning process. Dedicated gardeners expect to put time, energy and money into their project. Determining which plants are suitable starts off with observation, education, and some trial and error.

Observations

The best way to quickly find out what might grow in your yard is to look at what others have established in your area. All due diligence has been done in a successful yard; climate, exposure, soil, moisture, etc. If the neighbors can grow it, you might be able to also. (Neighboring gardeners have discussed among themselves of why someone can grow one thing and the other cannot.) Local vendors and growers are also savvy to what successfully lives and can advise you and/or troubleshoot about what to plant.

Research

If you browse catalogs or books for plants(s) and ideas, know the USDA Zones. Plants are classified by their hardiness to minimum cold temperatures. Using the USDA Hardiness zone map, assume we live in Zone 4 (Zone 3 for higher elevations. Some information sources that are not Colorado based use their own standards and can be confusing. It’s best to stick with Colorado based information and a few great resources are Colorado Nursery & Greenhouse Association booklets and Colorado State University Extension websites.

In your search for information make sure you know what you have to work with; i.e., know your site. Knowing the site helps guide the plant selection. Specifications that matter are: elevation, hours of sun exposure, micro niches, source of irrigation (if any) and soil condition (porosity, water retention, nutritional yield). Trees that thrive back east may not like the elevation where you live. If the soil is to be unaltered, then the selection will be geared more towards natives from a similar habitat. (Native willows would not thrive on an exposed mountain top, unless there’s a natural spring.)

Trial and Error

Once the right plants are in place they require maintenance. Even native installs need a little nurture to establish, especially in drought years. Exact matches for the site may be dug under by ground voles or suffer snow rot. Foraging deer are a serious threat to newly installed landscapes. If they have a browse habit through your proposed area, you might try some deterrents before investing in the ornamental fodder. There are many lists of plants that the deer don’t like, but they’ll taste what they want when you’re not looking.

There’s a difference between thrive and survive! Just because the plant is listed for your area, may not mean it likes your yard. Some things may have to change and the last thing to change may be choices. Every garden is an ongoing project and initially it’s driven by trial and error. Once you’ve found selections that do well, add more!

Author Administrator Category How-Tos

Growing Structures: Extend Your Harvest

In the Colorado Springs area there’s about 5 months of frost-free growing (less if you garden at higher elevations). For many vegetable garden crops, that’s enough time from sow to harvest, provided no foul storms or wildlife damage intervenes. With tasty, nutritious and bountiful success comes the urge to gain more on the returns, so begins the search for season extenders.

Adding frost protection allows a gardener to start the crops earlier, supplement another crop rotation and/or harvest later into fall. It also gives a window of opportunity for long season crops to come into fruition like beefsteak tomatoes. Extending the growing season doesn’t necessarily mean that heat is added, it can mean the plants don’t freeze. Often the temperatures hold high enough to begin gardening before the last frost date. But all it takes is one rogue night to reset the start date for that year. That’s where a buffering insulation adds assurance against damage or death.

Commercially available covers are used over the young plants early in the year to prevent frost while the roots anchor in. Those are usually left on until the chance of frost is past. Something as simple as a five-gallon bucket can be used to gain the same results but should be taken off during the day to allow ventilation and sunlight.

Placing something with mass (like a large rock or clear gallon jug of water) next to a plant can absorb heat by day and might be able to fend off the cold morning temperatures until sunlight comes. Develop that idea a little more, using stacked timbers or black painted cinder blocks and there’s combined heat retention and protection from cold winds. Broaden the resources more and a south facing building or wooden fence becomes ideal for sun exposure, heat buildup and wind protection. Since most fences are permeable, any solid lining on the fence can prevent cold air seepage by night.

Implement a structure that can support plastic from the vertical wall and a cold frame is built! Plastic covering will slow the heat loss or prevent the damaging freezing temperatures. Use clear plastic to transmit light through providing the “greenhouse effect”. Black plastic will absorb the heat but doesn’t transmit that energy. The idea is to gain sun energy in the object(s) under the plastic, be it plants, soil and /or water jugs.

Growing structures come in many different shapes, sizes and materials. Beyond durability, the most important considerations are access: for watering; ventilating; and harvesting. Once the footprint of the garden is decided the structure can be built from there. Wood, plastic sheets and rebar are the most accessible for a “do-it-yourselfer”. The plastic sheeting should be UV resistant and at least 20 mil thick. Sometimes a local nursery/greenhouse will recover their roof and the old roof can be re-used for the hobby greenhouse.

Raised beds offer a base structure for a hoop house. Within the wood frames, PVC piping can be anchored onto rebar shunts that have been pounded into the ground. A central wire can connect the hoops horizontally so the structure doesn’t waffle under a snow load. Plastic can be draped over the structure and tightened down with wood slats, clamps or whatever. Once the growing season has been established the plastic can be replaced with chicken wire or hardware cloth to curtail hail damage. In the fall the plastic can go back on to stretch more harvest out of the year. Greenhouse structures can be simple or complex- depends on the budget and dependence on the productivity. (Click here to learn about “Greenhouse Energy Conservation” – a book written for building a serious greenhouse structure)

There’s nothing quite like walking into the humid, quiet, growing stillness of a warm greenhouse, no matter how big or small. Select a site that will maximize sunlight hours. As for greenhouse size, framing material, cover material and utility there are so many different variables and options that all the details cannot be covered here yet are easy to research. The covering is critical for sunlight allowance but the side material can be made from other, ideally more insulated materials, even dirt. Glass, UV Plastic or Lexan are used with equal plant growing success. All can succumb to hail and age but they have differences in longevity, insulation and pricing. The exterior of the frame supports the outside covering and the inside of the frame can have another layer (of plastic) to buffer heat loss, and can stay on to filter sun penetration during the summer. Should the summer sun cause damage, a shade cloth may be suspended from the interior of the frame. Heat buildup during the summer months may warrant ventilation either passively (doors and windows) or mechanically (fans). Farm supply companies offer gadgets and equipment that can be useful and fun like heaters and fans and even a thermostat/ timer so the heater and/or fan will run only at certain times. Flooring can be many different materials i.e., landscape fabric, bricks, tiles or the garden itself. Hardware cloth under the garden or flooring can deter some of the burrowing animals (for a while). Again, budget and personal preference plays a big role in the planning. As beneficial as a greenhouse is for plants, so it is for the organisms that live on those plants. So watch out for critters and insects!

Each year has different challenges to offer from temperatures to snow fall to bugs. What works for one gardener may not for another, but it sure is fun to share and compare stories. Use a calendar and thermometer to record useful information and not just guesses. Make notes in a gardening journal to record your successes, failures and lessons and you might be able to push the boundaries a little further next year.

Author Administrator Category How-Tos

High Altitude Gardening

How far above sea level is it, really? Approximate elevation for the Teller County areas are: Cripple Creek 9500 ft; Divide 9100 ft; Florissant 8200 ft; and Woodland Park 8500 ft. That could mean very little to some or be significant to others. To gardeners it’s a limiting, yet not debilitating, factor. The distinction between what plants can survive versus what will thrive results from the suitability and/or adaptability of the plant to the supporting environment. Colorado mountain environments offer soil with very little water holding capacity and low nutritional value; sun exposure that can be desiccating; temperatures are rarely sizzling and can hit way below freezing; infrequent rainfall and variable snow fall (any time of the year) and a short growing season.

Site Selection

For any garden the primary elements that will dictate success are soil and the amount of sun and water. Organic matter added to any soil enhances the water holding capacity and nutritional value. It can constitute home generated or store bought compost, aged manure or bagged products from the garden centers including mushroom, alfalfa, cotton burrs, etc. Generally 2-3” of organic matter worked thoroughly into the top 12” of soil makes a good starter soil or foundational base for a lawn. The serious vegetable grower may want to bring in a good blend of soil for raised beds then re-invest with amendments each year. For a landscape using only native plants, a little organic matter in the initial hole with supplemental water the first few years should be good enough.

Lighting

Lighting can be direct sun, indirect or filtered, cooler sun in the morning, hotter in the afternoon or all day with added heat reflected off an object and/or structure. There may even be a combination of several of those. Knowing what the site has to offer will help plug in the right plant. Consider that 3 hours or less of direct sun will support a ‘shade’ loving plant. Filtered sun for half of the day would also support a shade plant, while filtered all day sun will probably support a ‘partial shade’ plant. A plant wanting ‘partial shade’ will do well with 3-5 hours of sun a day. ‘Full sun’ plants require 6-8 hours direct sun for best performance. Most vegetable gardens are positioned for maximum sun light since healthy tops and/or blooms result in the edible produce. During the peak of summer heat, even the ‘full sun’ plants may wane, like many people. If, with adequate water, they rebound in the cool of the evening, know that it’s just the heat. Overwatered plants give the same symptoms of drought, which is wilting, due to lack of oxygen in the soil. If plants don’t rebound in the cool of the evening, move them to a cooler site to relieve stress (if you can) and hold up on the water until they recoup.

Watering

Watering is probably most misunderstood since under the soil surface is the unknown. Roots will develop where the water goes, but if the soil stays soggy due to frequent shallow sips, the roots stay shallow because of lack of oxygen. If the water isn’t allowed to drain out from below the roots, then salts and calcium’s (in the water) can accumulate and cause further problems. The best watering practices are generous and infrequent. Initial water for a newly transplanted plant should be thorough; enough to settle the surrounding soil. To determine when the plant needs water again is to wait until it goes to a slight wilt. If it takes 5 days to wilt then water generously every 4 days. Obviously more water is needed in the dry heat than the cool spring or fall. Adding 2-3” of mulch can eliminate approximately one watering per week during the summer.

Winter watering is very important especially if there has been no snow for a month. By the end of October most deciduous perennials, shrubs and trees have lost their leaves and have very little evapotranspiration. Evergreens will lose more moisture through their needles because of our “Indian Summers”. Because the soil has very little water holding capacity, it’s important to water monthly until there’s adequate snow. Lack of moisture and freezing temperatures can attribute to ‘freeze dried’ plants. Choose a warm day and make sure the plants that are most exposed to wind and sun get a big drink. Mountain temperatures don’t heat up until mid-June (night time temps matter too) or later and that’s when the full water schedule can get put back into effect.

Growing Season

The average last killing frost of spring is around June 15 and the average first killing frost is September 15. That’s right, only 90 days and that’s hardly enough time to reap the benefit of what’s been sown. That’s why many gardeners start plants inside early and/or provide shelter(s) to protect their plants and extend their growing season. (See Teller County Master Gardener Article Growing Vegetables)

Other Challenges

Deer and Elk provide beauty to the mountains, but to the gardener, they can be another hindrance to a thriving garden! Although they are particular to some plants and not others, it’s advisable to do some research before planting. The research may be for Preventing Deer Damage (http://www.ext.colostate.edu/pubs/natres/06520.html). Then there are the rabbits and voles so you may be researching for building a protected garden.

Weather offers another element that can bring down a garden in 15 minutes or less: Hail. Disease or insects can easily move into the vulnerable exposed areas of the plant so clean up the dead material, trim for health and within a few days begin a nitrogen fertilizer to try to regain strength in the plant.

Success is not easily achieved for the mountain gardener, but there’s nothing sweeter than a successful garden in the mountains!

Author Administrator Category How-Tos