Lady’s Mantle

(Alchemilla) A lovely long blooming perennial. Has large, low growing leaves. Sprays of yellow flowers sit atop the foliage and mix with any other color in your garden. Flowers will age to a buff color post bloom. Leave them for a Fall accent or clip back as desired. Will re-seed new clumps in moist, bare soil.

Exposure: Full to Part Sun

Bloom Time:  Late Spring-Early Summer

Seed Starting

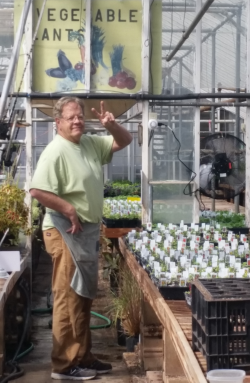
The do-it-yourselfer had already invested time thinking about this season’s garden. Folks have been making adjustments from successes and failures, reviewing the course of action, perusing gardening catalogs and web sites for new ideas. The well rooted gardener always comes back to getting the plants started right! Seeds are cheapest, but cost in time and effort! Here are some quick tips to getting the little sprouts off to a good start.

Starting Seeds:

Moisture– Water as you introduce the seeds to soil, but do not keep soggy!
Lighting– Lamps and sunlight provide some heat, but UV’s aren’t needed for the seed to sprout.
Heat– 70-80*F for the 1st 5+ days, until 80% of the seed batch has germinated, then reduce temps.
Soil– Lightweight and well drained! Commercial peat base soils are good enough.
Seed depth– Seed size = seed depth. You should be able to see the seed(s) unless it’s a big seed!

Growing Sprouts

Moisture- Only a little water at first to keep it upright- too much easily rots the young plant.
Lighting– As much bright light as possible and for 10- 12 hours (supplement if needed); this helps keep it from stretching giving it a strong stem!
Heat-55-65*F Reducing the heat quickly after germination keeps the young plant stocky and strong.

The 1st sign of life when the seed coat cracks open and the initial root emerges is germination. Within a day or 2 the first set of leaves appear and now it’s a sprout!

Window ledges are great for young sprouts because of bright light and cooler temps. Too much water and too much heat results in a tall, limp seedling that dies quickly.

Timing– Calculate time from germination to setting the plants in the garden according to the seed packet. If the intention is to grow a larger plant indoors, ensure ample lighting (direct or supplemental) to prevent stretching! Season extenders* can be used to get cold tolerant plants in the ground up to 4 weeks ahead of schedule!
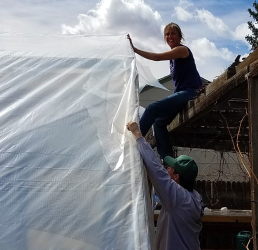
*Season extenders: Wall of Water, Frost Covers, Row Covers, Hoop Houses, Greenhouses, etc.

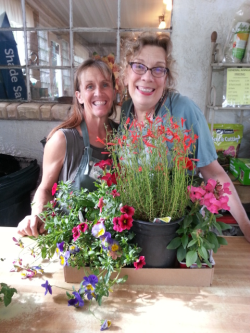
Setting Out The Plants


Outdoor elements like sun intensity, temperatures and wind take a little getting used to. Introduce the young plants on mild days, limiting yet increasing exposure to reduce stress. A few days and most adjust well before setting them in the ground. If you don’t have the luxury of time, cover the plants initially when they’re in the ground to reduce some of the shock with a lightweight fabric. If they can stand upright and rigid- they’re good to go!

Chocolate Flower

Chocolate Flower

(Berlandiera) Ever blooming native wildflower from the Southwest that produces a continuous succession of dark-eyed, yellow daisies over a compact rosette of foliage. The flowers exude a rich chocolate aroma in the morning hours. Best with minimal water once established. Can reseed. Perennial. Xeriscape.

Exposure: Full Sun

Bloom Time: June to Frost

Varieties:

Chocolate Flower: 12″-20″H x 12″-20″W.  A Plant Select Perennial.  More Info Here.

Valerian

This perennial practically blooms all season long.  It forms a small bush at maturity and is LOVED by all kinds of pollinators….butterflies, bees, hummingbirds.  Not for high altitude locations but a wonderful perennial for the Colorado Springs area.

Exposure: Sun

Bloom Time: Summer to Fall

Varieties:

  • Red Valerian:  18″ H x 18″W, Zone 5.

Hosta

Hosta

What would a shady garden be without hostas?  Their leaves add color and texture.  As a bonus, they flower in Summer with bell-shaped blossoms held above their foliage and are a nectar source for hummingbirds.

Exposure: Shade to Morning Sun

Bloom Time: Late Spring to Early Summer

Assorted Varieties:

Hosta Asst
Hostas for Shade

Potato Growing Instructions

Potato

Plant indoors about 3-4 weeks before last frost in loose, well-drained soil.

Cut “seed” potatoes so that each piece has at least 2-3 eyes; allow to air dry (callus) 5-7 days before planting.

Plant 2” below soil, about 24” apart; water and mulch. Keep moist-not soggy.

After they bloom and plants start to decline, reduce water and you can harvest.

If a green potato appears above the soil level it is best not to use it.

Potatoes will store underground until frost.

Author Jen Pelto Category How-Tos

Asparagus

Perennial roots are available commercially as 2 year olds. Soil should be well drained and rich in organic matter. The crown of the root needs to be planted 12-18” below the soil level. Dig a trench 18” deep and spread the long roots sideways to nestle the crown low enough. Cover the crown with 3” of soil and water in. After a week or so a sprout will appear. Allow it to grow 8-9” and cover ½ way. One the sprout has cleared the soil level by several inches fill in the rest of the trench. They prefer some moisture but not a lot. Once they are established they require little care. You can begin harvest after 2 years.

Variety

Martha Washington – 3 year old plants

Author Jen Pelto Category How-Tos

Seed Definitions

Heirloom: Historically harvested seeds (over decades) that produce roughly identical plants from generation to generation.
Open Pollinated: Seeds are produced by wind or self-pollinated and produce roughly identical plants from generation to generation.
Hybrid: Seeds generated from 2 parent strains targeting specific characteristics; heavy production, disease resistance, hardiness, etc.
GMO: Genetically modified Organism. Genetic engineering inserts genes into another unrelated organism to bring a desired outcome, eg; bacteria introduced into corn to offset the damage of earwigs on the ears of corn.
Organic seed: Any seed produced meeting the USDA standards for Organic growing; does not include GMO’s.

Author Jen Pelto Category How-Tos

Onion Growing Instructions (Allium)

Any of the alliums can be sown in the garden March/April and can be planted provided the plants are hardened off. They like a loose, moist (not wet) well-drained soil.

Sets:
Small bulbs are sold bagged and usually develop into stewing type onions. Plant with the pointed side up, just under the soil line.

Scallions/Bunching Onions/Green Onions:
Easily seeded in the garden early spring or started indoors late winter. The whole plant is harvested and used. The tops can be used much like chives. The small root bulb is mild in flavor. Sow in a shallow trench, use a seed tape or plant young seedlings. Plant with the white bulb just slightly below the soil line.

Slicing Onions:
Transplants are usually young onion plants sold bundled or in soil. Starting them indoors early guarantees a larger onion earlier in the growing season. Plant so the white (yellow or red) roots are concealed by dirt. The may be flimsy at the start but will firm up in days. As they mature the top foliage yellow and shrinks. They can be harvested and stored by hanging them (including the tops) or clean up the bulbs and store in a refrigerator.

Leeks:
Started by seed indoors late winter. They don’t develop a bulb like onions, rather develop a thick stalk used for soups, egg dishes or general flavoring. Plant by seed or young seedlings. Harvest when the stalk is large enough for slicing.

Author Jen Pelto Category How-Tos

Corn

One of the easiest crops to grow- corn is a grass type plant.

It likes it sunny with supplemental nitrogen.

“Knee high by the 4th of July” is the adage that determines if you’ll be harvesting or not!

Seeds can be soaked overnight before planting to help break the seed coat. Sow just below the soil line.

Overall, the crop excels with a fertilizer or soil nutrient high in Nitrogen.

Author Jen Pelto Category How-Tos